
Education
Ankle Foot Orthosis
Your orthosis is a highly specialized device. As with any such device, the orthosis requires regular maintenance. It is very important that you see your orthotist at least every six months for a check-up and maintenance of your orthosis. Please Call 508-991-5577 if any unexpected problems occur.

To facilitate wearing of your orthosis, you must follow these instructions as closely as possible:
- PUTTING ON YOUR AFO: Put the orthosis on first, then the shoe. A shoehorn my be helpful, or slip the orthosis into the shoe first, and then slide the foot into the orthosis, using it like a shoehorn.
- SHOES: The AFO should be worn with a shoe at all times. The plastic is too slippery to be worn without a shoe. Wear laced shoes that are the same heel height. Avoid spiked heels, slippers, sandals, and loafers. It will be necessary to increase the shoe size to accommodate the AFO.
- WEARING SCHEDULE: Only increase the wearing time if you are able to wear it fairly comfortably. You may experience some discomfort in other parts of the body such as in your knees, hip, back, and neck. Your orthosis may need to be adjusted. For this reason, it is important to keep your scheduled follow-up appointment to maintain the optimum fit and function of your orthosis.
- SELF EXAMINATION: Examine your skin under the orthosis every day. Redness of skin under pressure areas of a new orthosis may develop. The redness should disappear 20 to 30 minutes after the orthosis is removed. As you become accustomed to the orthosis, the redness should disappear. If blisters or open sores occur in the pressure areas, stop wearing the orthosis and contact your orthotist for adjustments.
- KEEPING YOUR ORTHOSIS CLEAN: Clean your AFO by using rubbing alcohol (isopropyl alcohol) and wiping with a damp cloth. Completely dry with a towel or allow the orthosis to dry at room temperature.
- PROPER FIT: Similar to a new pair of shoes, a correctly fitted orthosis may seem uncomfortable at first. During the first few days, alternate times in and out of your AFO while noting any red or sore areas. As you build up tolerance, increase wearing time as advised by your physician or orthotist.
- DO NOT attempt to repair the AFO yourself. If you have any questions or concerns about your AFO, please contact your orthotist. Your health and comfort are important to us.
- FOLLOW-UP: The orthotist will schedule a follow-up visit to make sure the AFO is working and to make sure you are wearing it correctly. A follow-up appointment should be arranged every six months.
- SQUEAKING: If a squeaking sound is detected from the orthosis rubbing in your shoe, a light dusting of talcum powder should remedy this noise. To facilitate wearing of your orthosis, you must follow these instructions as closely as possible.
Please Contact Us if You Have Any Questions 508-991-5577
Foot Care
Inspect your feet every day, and seek care early if you do get a foot injury. Make sure your health care provider checks your feet at least once a year – more often if you have foot problems. Your health care provider should also give you a list and explain the do’s and don’ts of foot care.
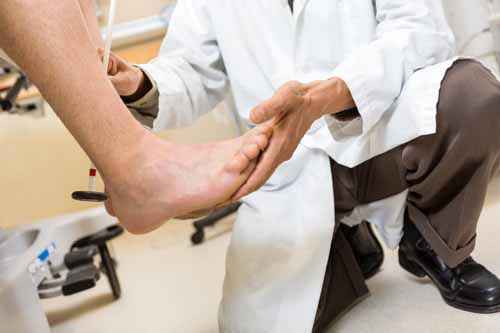
Most people can prevent any serious foot problem by following some simple steps. So let’s begin taking care of your feet today:
- Your health care provider should perform a complete foot exam at least annually – more often if you have foot problems.
- Remember to take off your socks and shoes while you wait for your physical examination.
- Call or see your health care provider if you have cuts or breaks in the skin, or have an ingrown nail. Also, tell your healthcare provider if your foot changes color, shape, or just feels different (for example, becomes less sensitive or hurts).
- If you have corns or calluses, your health care provider can trim them for you. Your health care provider can also trim your toenails if you cannot do so safely.
- Because people with diabetes are more prone to foot problems, a foot care specialist may be on your health care team.
Keep your feet healthy with these self-care tips.
- Take care of your diabetes. Work with your health care team to keep your blood glucose in your target range.
- Check your feet every day. Look at your bare feet for red spots, cuts, swelling, and blisters. If you cannot see the bottoms of your feet, use a mirror or ask someone for help.
- Be more active. Plan your physical activity program with your health team. i Ask your doctor about Medicare coverage for special shoes.
- Wash your feet every day. Dry them carefully, especially between the toes.
- Keep your skin soft and smooth. Rub a thin coat of skin lotion over the tops and bottoms of your feet, but not between your toes. la If you can see and reach your toenails, trim them when needed. Trim your toenails straight across and file the edges with an emery board or nail file.
- Wear shoes and socks at all times. Never walk barefoot. Wear comfortable shoes that fit well and protect your feet. Check inside your shoes before wearing them. Make sure the lining is smooth and there are no objects inside.
- Protect your feet from hot and cold. Wear shoes at the beach or on hot pavement. Don’t put your feet into hot water. Test water before putting your feet in it just as you would before bathing a baby. Never use hot water bottles, heating pads, or electric blankets. You can burn your feet without realizing it.
- Keep the blood flowing to your feet. Put your feet up when sitting. Wiggle your toes and move your ankles up and down for 5 minutes, two (2) or three (3) times a day. Don’t cross your legs for long periods of time. Don’t smoke.
Please Contact Us if You Have Any Questions 508-991-5577
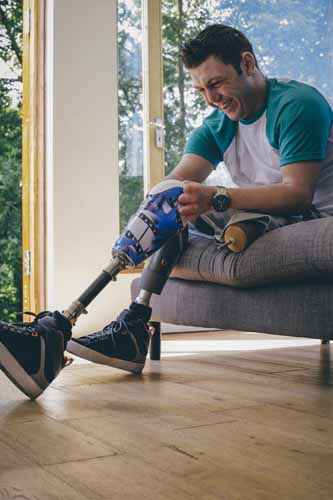
Gel Liners Wear and Care Guide
Invert the gel liners, ensuring that seam is positioned away from any bony areas. The liner must be totally inverted to keep air from becoming trapped in the liner. Align and use both hands to help roll the liner onto the limb.
Once you remove your limb from the socket remove your sock(s), if applicable. With both hands, grab the top of the liner and slowly pull the liner down and off of your limb. If you have long fingernails, be careful not to puncture the liner. UNLESS SPECIFIED, DO NOT WEAR A SOCK UNDER YOUR LINER. Place liner on drying stand if provided. Do not leave liner with gel surfaces out.
If you received two liners, it is best to alternate wearing them every day. This will prolong their life and allow them to keep their original shape for a longer period of time.
Hygiene is very important, clean your liners following product specific instructions provided. Contact your practitioner immediately if you should encounter any skin problems.
Each liner product comes with a warranty that begins when it was purchased and varies from product to product see specific information provided for exact details. It is important to contact us immediately if failure occurs so that we can contact the manufacturer.
Please Contact Us if You Have Any Questions 508-991-5577
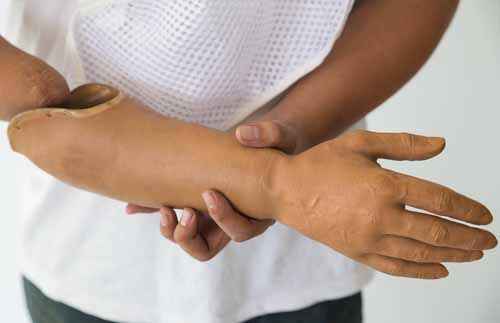
General Limb Care
Caring For Your Prosthesis
- Check your skin each day after wearing your prosthesis. Inform your practitioner immediately if you have breakdown or notice redness on your skin that remains longer than 10-20 minutes after removing your prosthesis.
- Proper hygiene is important in maintaining a healthy environment for your limb, please wash your limb daily and follow product instructions provided for your supplies.
- If you encounter a rash under your liner or sleeve, you may need to clean the item. See your instruction sheets for proper cleaning of these products. Contact us if this problem continues.
- DO NOT wear your prosthesis to bed. Put it on in the morning and take it off when napping or retiring for the night.
- You will lose fit within your socket as your limb changes. This is normal if you are a recent amputee or if your weight changes. We can adjust the prosthesis to accommodate for change within reason.
- If you wear prosthetic socks be prepared to adjust for changes in volume as your limb swells or contracts. Keep your supplies handy!
- Notify us of any significant change in health, weight or activity level.
- If you encounter fitting issues or have concerns contact us, we may be able to offer suggestions to correct the problem with information you give to us.
- If you have gained or lost weight, this could affect your fit. It may be time to visit your prosthetist for an evaluation of your prosthetic fit.
- A visit to your prosthetist twice a year is recommended for follow up to check your limb and the prosthesis.
- In the event you fall, contact us as soon as possible, (ASAP) so that we may inspect for possible damage and correct to prevent further damage to you or your prosthesis.
Please Contact Us if You Have Any Questions 508-991-5577

How to use and Care for Your Body Jacket
A Body Jacket is a custom molded spinal brace designed to protect, stabilize and limit motion in your spine and torso.
- Wear a snug fitting cotton tee shirt under your Body Jacket; it will absorb perspiration, protect your skin and keep your Body Jacket clean.
- Wear your Body Jacket in the correct place. There is usually an indented area inside your Body Jacket. The indented area fits into your waist just above your hip bones. Use this as a guide to help you position your body jacket correctly.
- Wear the Body Jacket as snugly as possible; this will provide the most support to your spine and torso.
- Spinal orthoses have a tendency to “ride up” on your body as the day progresses (when you sit your hips tend to become wider and push the Body Jacket up). You will need to readjust your Body Jacket throughout the day to ensure proper positioning.
- When you remove your Body Jacket, check your skin for any red pressure areas. Any reddened area that does not fade after 20 minutes should be watched carefully. This is especially important if you are diabetic or have poor sensation.
- Your physician will tell you if you need to wear your Body Jacket full time or only when you are not lying flat in bed. Ask your physician when you should wear your Body Jacket, and follow those instructions carefully.
- Do not become discouraged if you feel an adjustment is needed. This is not unusual. A minor adjustment might be needed to ensure a good fit. Call your orthotist to discuss this. How to Care For Your Body Jacket
- Clean your Body Jacket at least once a week with a mild soap, and rinse well to remove soap residue.
- If you have a removable liner, follow the washing instructions on the tag sewn into the liner or ask your orthotist for directions
A Body Jacket is a very specialized device. It is VERY important to keep all follow-up appointments made by your orthotist. Schedule an appointment at 508-991-5577 if any unexpected problems occur.
Please Contact Us if You Have Any Questions 508-991-5577
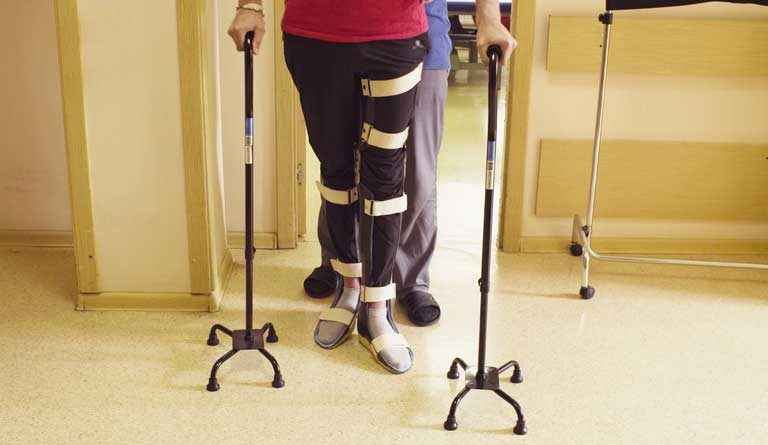
Knee Ankle Foot Orthosis (KAFO) Use and Care Instructions
A Knee Ankle Foot Orthosis (KAFO), sometimes called a “long leg brace” is a custom made brace used to support muscles, immobilize joints, or correct the position of your knee, foot and ankle. Your KAFO may perform some or all of these functions. A KAFO may be made of metal, thermoplastic or a combination of materials.
- If there is a thermoplastic ankle and foot section to your KAFO, you will need to wear a lace-up shoe that has enough room for both your foot and the brace to fit comfortably.
- Wear a cotton sock between your skin and the brace. The sock should be long enough to cover your entire calf. Your orthotist may have provided you with a special full length sock to wear. The sock will absorb perspiration and help protect your skin.
- When you first try to walk with your brace, you may feel awkward. Practice in your home or with a physical therapist before you walk outside.
- Begin wearing your brace for one hour at a time, then take it off and rest your leg. Alternate wearing the brace and resting your leg for the first few days. Slowly increase your wearing time over the next several days.
- Cheek your leg for any red pressure areas. Any reddened area that does not fade after 20 minutes should be watched carefully. This is especially important for patients who are diabetic or have poor sensation in their leg. Call your orthotist if you have any concerns.
- Do not become discouraged if you feel an adjustment is needed. A minor adjustment might be needed to ensure a good fit. Call your orthotist to discuss this.
- Clean the thermoplastic sections at least once a week using mild soap, and rinse well.
- Metal joints will require periodic lubrication. Ask your orthotist what type of lubricant to use.
A KAFO is a very specialized device. It is important to keep all follow-up appointments made by your orthotist. Please Call 508-991-5577 if any unexpected problems occur.
Lumbar Support Wear and Care
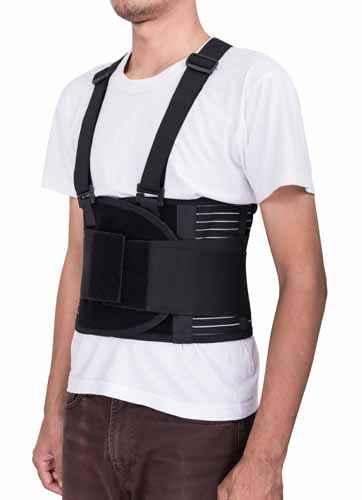
- When you wear a lumbar support belt, make sure you have the right size. Measure around your lower back region to determine the correct size. If you have a large midsection, consider getting the next size up so that you will be comfortable.
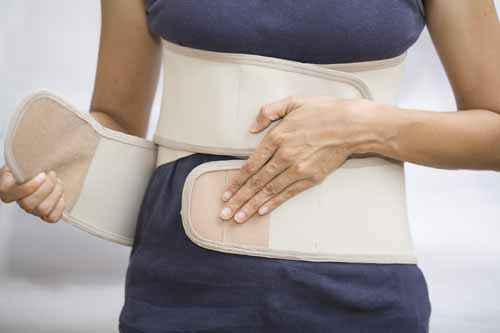
- If your lumbar belt has 2 side flaps that Velcro to the belt, release these flaps from the Velcro and park them at the edge of the belt, so that you can easily make the belt extra snug in the last steps.
- Often in the back of the belt there is a flap that tells you the center of the belt positions. Position this tag or marker in the center of your lower back. Make sure the side seams stay aligned with your pant seams.
- Make sure the width of the belt covers the lumbar (lower back) and sacral (tailbone) area.
- Do not suck your stomach in all the way, and do not let your midsection (belly) hang out all the way before putting on the belt. Start with a neutral position in which you are comfortable.
- Wrap the belt around to the front. When you Velcro the first part of the belt, make sure the two surfaces are matched up and you have a solid foundation from overlap. You do not want to have a crisscross pattern, or your belt will ride up and not stay in the proper position.
- If your belt has extra support flaps that you parked in step 2, use those for extra support around your waist and bring them to the front and Velcro fully.
- To make sure your belt is properly positioned, make sure the top edge of the belt is at or below the navel.
- ****Optional: For further relief of lower back pain, especially for an acute injury with inflammation present or flare up, take an ice pack and place that in the lower back region; then put the belt on top of the ice. The use of ice will cause numbing sensation and decrease inflammation which can lead to a faster recovery.
To determine if a lumbosacral belt will give you relief, do this simple test:
- Overlap your hands and place them on your lower belly.
- Lift upward and inward. If your feel immediate pain relief in your lower back, a lumbar support belt will be of benefit to you.
Lumbar support belts are best utilized with weak or fatigued muscles, with recurring low back pain, or when recovering from a low back injury If you have a history of lower back pain, and you will be lifting a heavy object, using the belt will be beneficial.
You can also buy lumbar support belts with suspenders for extra support. Choose a lumbar support belt with double side pulls for excellent abdominal compression. You should only use a lumbosacral belt for the first few days or weeks after an acute injury as well as for a flare up. It is also a good idea to wear the belt when you are lifting a heavy object, particularly if you have a history of lower back pain.
Make sure your belt is not too tight; This will make it uncomfortable to breathe and move around The key to an effective lumbar support belt is fit- double check to make sure you have the right size for you It is not a wise idea to put your lumbar back belt into the washing machine to clean. Rather, hand wash in cold water and let air dry so that the fibers and strength of the belt do not break down.
Please Contact Us if You Have Any Questions 508-991-5577
Prosthetic Safety Check
The 8 Steps To Check Your Prosthesis Daily
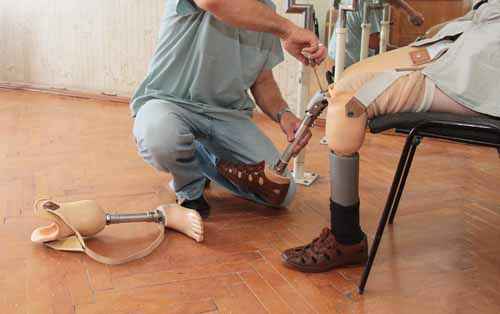
- You need to physically check your prosthesis daily and keep it clean. This is to ensure proper function and safety.
- If you hear any unfamiliar sounds or if any part of your prosthesis is not working or has been damaged. You need discontinue use and contact us immediately!
- If you have a locking mechanism, check that your pin is securely attached to the liner daily. Check the lock for dust and foreign material and the button should operate smoothly.
- If the shuttle lock fails to release Do Not Panic! Most often it is caused by your sock not being seated around the pin and a piece of it gets pushed into the lock mechanism. Have someone depress the button fully while you grasp the liner and pull. If this does not work please call for instructions. Tap lock button firmly with a hard object.
- If the shuttle lock fails to release Do Not Panic! Most often it is caused by your sock not being seated around the pin and a piece of it gets pushed into the lock mechanism. Have someone depress the button fully while you grasp the liner and pull. If this does not work please call for instructions. Tap lock button firmly with a hard object.
- Your components have been carefully selected, assembled, adjusted and secured according to the manufacturer’s specifications. Under no circumstances should you ever adjust or change your prosthesis. We are happy to correct any issue you may be having.
- A visit to your Prosthetist twice a year is recommended for follow up to check your limb and the prosthesis.
- In the event you fall, contact us as soon as possible (ASAP) so that we may inspect for possible damage and correct to prevent further damage to you or your prosthesis.
Please Contact Us if You Have Any Questions About Your Prosthesis 508-991-5577
Suspension Sleeves Wear and Care
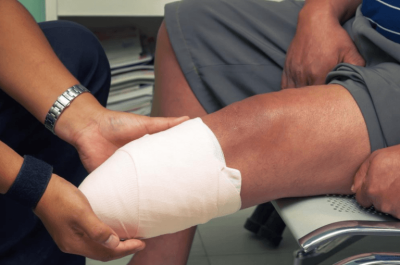
Pull your sleeve up onto your thigh so that the sleeve is in contact with your skin at least three to four inches. Be careful not to puncture the sleeve with your fingernails.
Grab the top of the sleeve with your hands and pull the sleeve inside out and down until the sleeve is below your knee and you are able to lift your limb out of the socket.*Not: Do not roll the sleeve down — this causes premature wear & tear of the sleeve.
Hygiene is very important. Cleaning of your sleeve needs to be performed on a daily basis. Please follow product specific recommendations provided. Contact your practitioner immediately if you should encounter any skin problems.
When the sleeve is not holding the leg as securely as it did when new, it may be time to change it due to stretching or tearing during normal use. Watch for excessive wear at the knee area.
If your sleeve is not maintaining suction, the sleeve may have a hole in it. To maintain good suction, you will have to change the sleeve. If you happen to get a rash or itchy area where the sleeve is in contact with your skin, call your practitioner immediately.
Contact Us If You Have Questions About Your Suspension Sleeve 508-991-5577
Velcro Cleaning Instructions
Helpful Hints on cleaning velcro on orthotic & prosthetic devices:
- Roll the hook-and-loop fastener with a lint roller. To remove the surface debris, use a lint roller that you would normally use on your clothes to roll the fastener. Lay the fastener flat, and hold at one end, rolling over it a few times with the lint brush. Refresh to a new sticky “sheet” of the lint roller as necessary.
- Press the hook-and-loop fastener with duct tape. Cut a piece of duct tape no bigger than your palm, so it doesn’t get unwieldy and stick to itself. Lay the fastener flat, and press the tape into the closure to get it to adhere to as much lint as possible. Holding the fastener firmly at one end, strip the tape away to remove the lint. Repeat as necessary.
- Use a stiff toothbrush to brush the hook-and-loop fastener. Use a stiff, plain toothbrush (just bristles no gum massagers or other plastic parts) to brush trapped lint out of the fastener. Lay the fastener flat, and apply pressure in short, hard strokes with the bristles from one end of the fastener to the other. Pick any lint that comes to the top with your fingers.
- Scrape the hook-and-loop fastener with the cutter of a tape dispenser. Use the edge of the tape dispenser that you would normally use to cut the tape to scrape the fastener clean. Lay the fastener flat, and use the teeth of the dispenser to rake it in short, firm strokes from one end to the other. Pick any ling that comes up with your fingers.
- Pick any deep lint out with needle-nose tweezers. For lint that is deeply embedded in the hooks of the fastener, use a pair of needle-nose tweezers to pick it out. Lay the fastener flat, holding at both ends. Then use the tips of the tweezers to tease out the debris.
- Brush lint out of the hook-and-loop fastener once every week. To keep the fastener closing well and lint free, clean it once a week. Doing this will keep debris from getting excessively embedded, which is more difficult to remove than surface lint.
- Fasten the hook-and-loop fastener together when not in use. Fastening the Velcro when you are not wearing it will keep debris such as lint and animal hair from sticking to the Velcro.
- Spray the hook-and-loop fastener with anti -static spray once cleaned. Anti-static spray, such as Static Guard, can make the fastener attract less lint and pet hair.
Please Contact Us if You Have Any Questions 508-991-5577
Wrist Hand Orthosis (WHO)
A Wrist Hand Orthosis (WHO) might also be called a wrist or hand brace. It is custom fit or molded and used to support weak muscles and immobilize or limit the motion of joints. You may require some or all of these functions. These braces may be made of thermoplastic, canvas, metal or a combination of these materials.
Please read the following instructions for wearing your brace and add any special instructions given to you by your physician or orthotist.
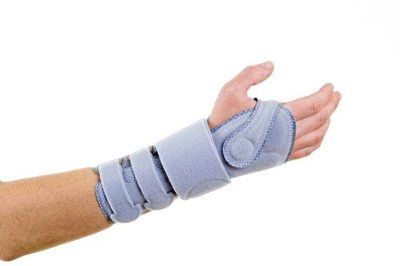
- If your brace is made from thermoplastic material, you will need to wear a cotton sock between your skin and the brace. Your orthotist may have provided you with a special sock to wear. A sock will absorb perspiration and help to protect your skin.
- Check your wrist and hand for any red pressure areas when you remove the brace. Any reddened area that does not fade after 20 minutes should be watched carefully. This is especially important for patients who are diabetic or have poor sensation.
- Do not become discouraged if you feel an adjustment is needed. This is not unusual. A minor adjustment might be needed to ensure a good fit. Call your orthotist to discuss this. How to Care For Your Wrist Hand Orthosis
- Clean any thermoplastic sections at least once a week using mild soap, and rinse well to remove soap residue.
- Follow any washing instructions on the tag sewn into a canvas brace.
It is important to keep any follow-up appointments made by your orthotist.
Schedule an appointment at 508-991-5577 if any unexpected problems occur.
Certified For Your Protection